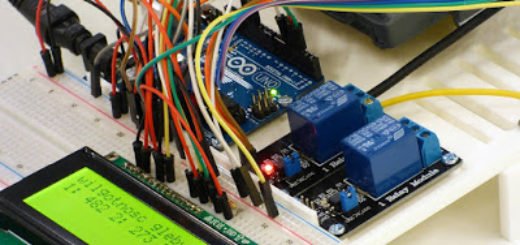
How to make a Digital Arduino Voltmeter
Here is a simple voltmeter project using Arduino to measure and display DC input voltages. It can be used to measure battery voltage, sensor readings, etc. It can be even used for measuring higher voltages with proper scaling of voltage values by voltage divider circuits.
Arduino voltmeter serial monitor
A serial monitor voltmeter can be used to display the voltage values on a PC screen. We are using the inbuilt Serial Monitor in the Arduino IDE to act as the terminal to communicate with the Arduino board.
A voltmeter measures the electric potential difference between two points in an electric circuit. Here between the pins A0 and the ground of Arduino.
The analog input across the input terminals is measured by using the Arduino analogRead() function. It can obtain values ranging from 0 and 1023 for the voltage values from 0 to 5V respectively. That is by taking 0- 1023 sample values for 0-5 Volts range.
The analog read values are then multiplied by a fraction 5/1023 to convert it to voltage range 0 to 5V. The voltage is then displayed on the Arduino serial monitor by the command Serial.print().
A delay of 1000ms is added to the program. So the analog input value is measured with a time gap of 1seconds between each reading. The number of measuring samples can be adjusted by varying the delay time in the code.
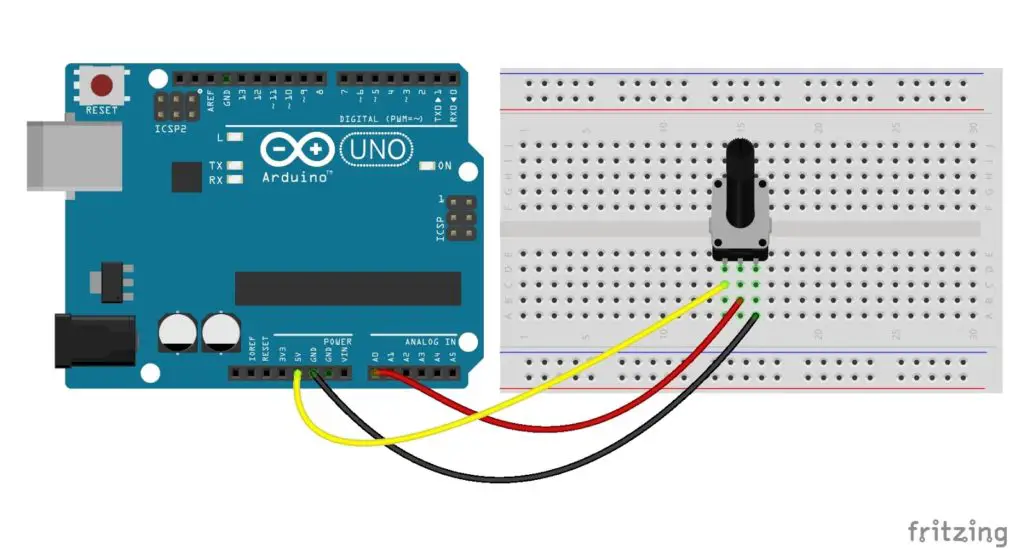
The circuit 1 shows an Arduino voltmeter with an input supply which is connected through a potentiometer to the analog input pin. By adjusting the potentiometer the corresponding voltage variations can be monitored on the serial terminal.
Serial monitor voltmeter code
Code for 0-5V range voltmeter
float volt, voltage;
void setup()
{
Serial.begin(9600);
}

void loop()
{
  volt= analogRead(A0);
  voltage =volt* (5.0 / 1023.0);
  Serial.print("Voltage = ");
  Serial.print(voltage);
  Serial.println("V");
  delay(1000);
}
Voltmeter measure high voltage with arduino
The analog input pins of an Arduino can only measure up to 5 volts. Thus, in order to measure higher voltages, a voltage divider network is added in the circuit as shown in the second circuit. The voltage divider can obtain an input voltage (v) in the ratio of the supply voltage (Vs), v = Vs (R1/R1+R2).
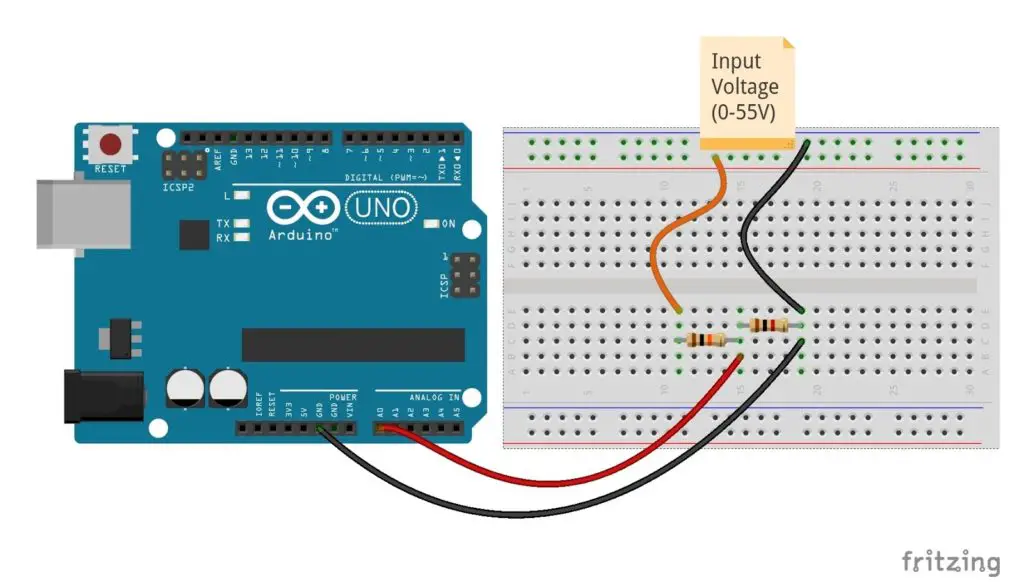
Code for voltage range 0-55V with voltage divider
int volt ;
float voltage;

void setup()
{
Serial.begin(9600);
}

void loop()
{
  volt= analogRead(A0);
  voltage =volt*(5.0 * 11/1023);
  Serial.print("Voltage = ");
  Serial.print(voltage);
  Serial.println("V");
  delay(1000);
}
Here we are using a 1K and 10K resistor for voltage division. The fraction of R1/R1+R2 obtains 1K/(1K+10K) =1/11, thus a constant 11 is multiplied with the equation to obtain the actual input voltage across the terminals. The voltage across the 1K resistor reaches a maximum of 5V for an input voltage of 55V across two resistors. Thus, here we can measure up to the maximum voltage of 55V. By varying the resistor combination, the input scale, accuracy, and the range of input voltages can be varied.
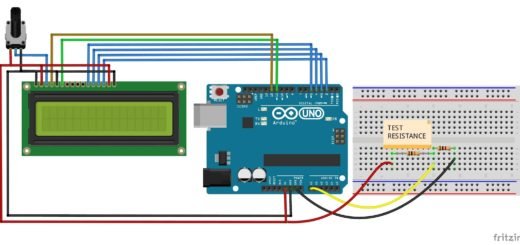
Arduino Voltmeter LCD
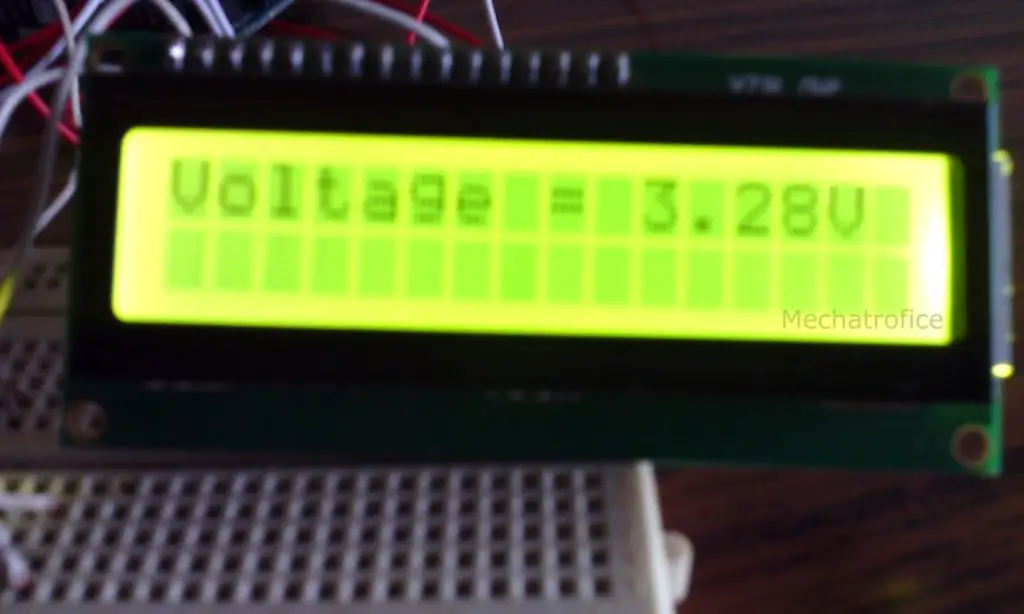
A Digital LCD Voltmeter (Direct Current Digital Voltmeter – DC DVM) can display the digital reading of voltages.
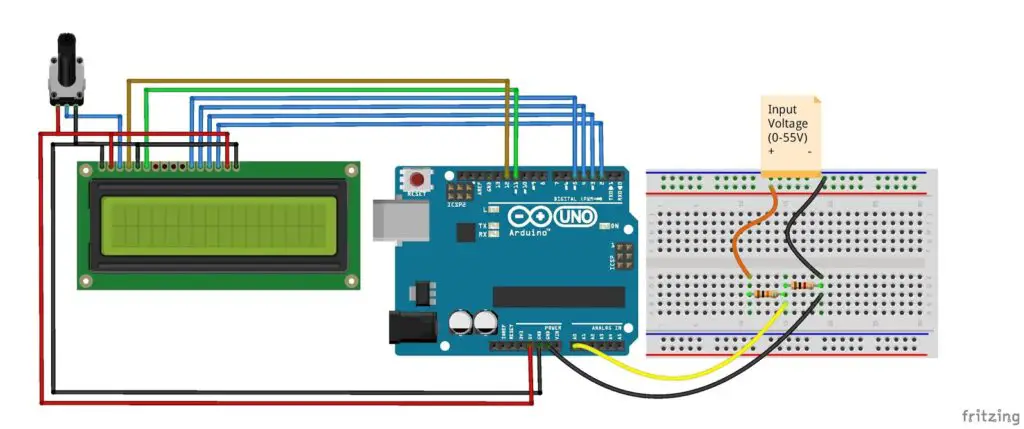
Here the circuit arrangement and working are the same as in the serial voltage monitor. The only difference is instead of serial monitor the values are displayed on the LCD display interfaced with Arduino. The values (range: 0 – 1023) read from analog input A0 (Input voltage range: 0 – 5V) is obtained as corresponding voltage values and display it as digital reading on the LCD.
LCD Arduino Voltmeter Code
#include <LiquidCrystal.h>

float volt, voltage;
LiquidCrystal lcd(12, 11, 5, 4, 3, 2);

void setup()
{
  lcd.begin(16, 2);
  lcd.print("Voltage =");
}

void loop()
{
  volt= analogRead(A0);
  voltage =volt* (5.0 * 11 / 1023);
  lcd.setCursor(10, 0);
  lcd.print(voltage);
  lcd.print("V");
}
Arduino Processing PC voltmeter
In the processing based Arduino voltmeter, the measured instantaneous voltage values are plotted graphically similar to a CRO display. Using the given circuit arrangement and code, a voltage value of maximum up to 5V can be measured and show graphically.
Arduino Code
void setup() {
  // initialize serial communication at 9600 bits per second:
  Serial.begin(9600);
}

void loop() {
  // read the input on analog pin 0:
  int sensorValue = analogRead(A0);
  sensorValue = map(sensorValue,0,1023,0,200);
  Serial.write(sensorValue);
  delay(1000);
}
The circuit arrangement of the here project is similar to the circuit given in the above Arduino serial voltmeter. The Arduino is just writing the analog read input values to the processing through serial communication and the processing draw the values to an X-Y graph.
Processing Code
import processing.serial.*;
Serial port_1;
int value;
int[] Yaxis;

void setup () {
  //change the 0 to a 1 or 2 etc, to match your port.
  port_1 = new Serial(this, Serial.list()[1], 9600);

  size(600, 400);
  background(0);
  Yaxis = new int[width];
}

void draw () {
  background(0);
  while ( port_1.available() > 0) {
    value = port_1.read();
    fill(190, 29, 3);
  }
  strokeWeight(2);
  for (int i = 1; i < width; i++) {
    Yaxis[i-1] = Yaxis[i];
  }
  Yaxis[width-1] = 350-value ;
  stroke(255, 255, 0);
  for (int i=50; i<width; i++) {
    point(i, Yaxis[i]);
  }
  stroke(51, 153, 255);
  line(50, 350, 600, 350);
  line(50, 350, 50, 0);
  textSize(12);
  fill(190, 29, 3);
  text("Time", 300, 390);
  fill(67, 255, 85);
  strokeWeight(.2);
  for (int i=0; i<=15; i++) {
    text(i, 50+(i*40), 370);
    line(50+(i*40), 350, 50+(i*40), 345);
  }
  for (int i=0; i<=15; i++) {
    line(50+(i*40), 350, 50+(i*40), 0);
  }
  translate(20, 200);
  rotate(-HALF_PI);
  fill(190, 29, 3);
  text("Voltage", 0, 0);
  rotate(PI);
  fill(67, 255, 85);
  for (int i=1; i<=10; i++) {
    text(i, 150+(i*(-40)), -15);
    line(150+(i*(-40)), -30, 150+(i*(-40)), -35);
  }
  for (int i=0; i<=10; i++) {
    line(150+(i*(-40)), -30, 150+(i*(-40)), -600);
  }
}