Motion detector PIR sensor HC-SR501 Arduino code and circuit
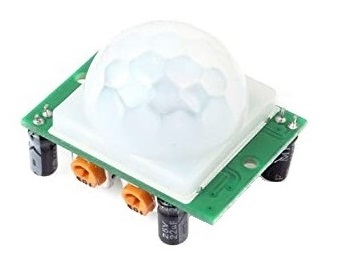
A passive infrared sensor is a device which detects the infrared rays emitting from humans, animals, or similar thermal ray source. An HC-SR501 sensor is a motion detector sensor that detects the motion of the infrared emitting sources, so if the thermal body doesn’t move, then the sensor doesn’t trigger. The sensor part of the module is a pyroelectric sensor with a Fresnel lens and circuit for a BISS0001 micro power PIR motion detector IC.
The detection range and the output ON time both can be adjusted by two potentiometers in the sensor module. It is indicated in the below image.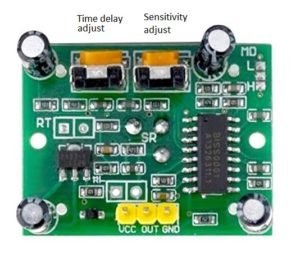
One potentiometer is to change the sensitivity that is the detection distance between the body and the PIR sensor module. The second potentiometer adjusts the time duration of output which adjusts how long the output needs to remain in the high state after the triggering. The On-time can be adjusted between around 2.5 seconds to 4 minutes and the range of detection is between around 3 to 7metres.
The module has 3 pins,
Vcc – It has an operating voltage of 5V, connect to the positive terminal of the supply or 5V pin.
GND – Connect to the negative terminal of the supply or GND pin.
OUT pin – Output is a digital output.
A PIR sensor returns the output as a Digital signal, it just gives a HIGH state if it is triggered by detecting a motion from an infrared emitting body else remain in a LOW state.
The module has two triggering modes L & H. L – mode is the non-repeat triggering mode and H – mode is a repeat trigger which is usually the default mode of the module. In non-repeat triggering mode, once the device is triggered the output switch to a high state and remains the state until the set time delay expires. Any further motion detected during this delay time doesn’t be considered and only triggering for the motion occurs after this time delay.
Whereas in a repeatable mode, after triggering the expired delay time reset and start the set delay time again for each motion detected during the HIGH state of the output. The time the output will remain ON is the duration of set time delay since the last motion detected by the sensor.
As the module has only digital output and no signal or control inputs, a microcontroller is not necessary to use the PIR sensor. The digital output can be used to give input to any switching circuits to activate an Alarm or similar indications.
HC-SR501 PIR sensor Arduino connection
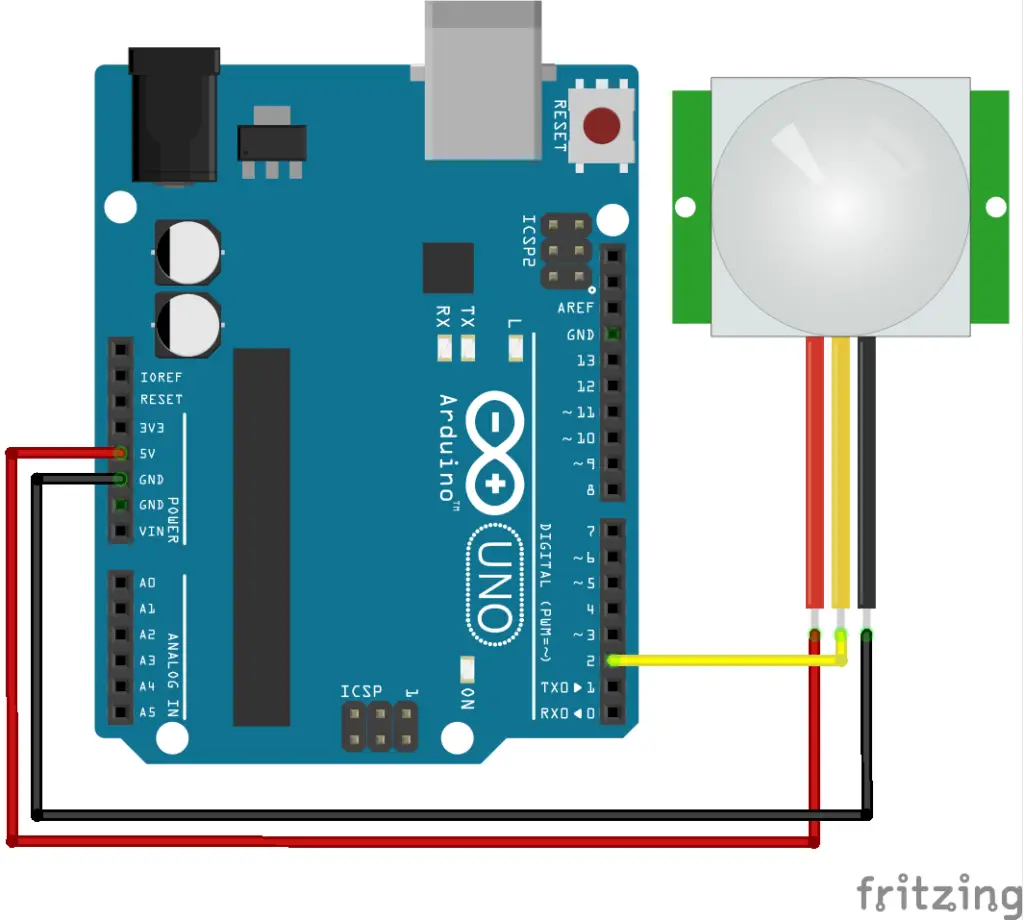
The Arduino can check whether the output is high or low and execute operations like activate the security alarm circuit, send an alert by any RF modules, make emergency calls with the GSM system, etc.
code
const int pir_output = 2;
//PIR sensor output at pin 2

void setup() {
  pinMode(pir_output, INPUT);
  Serial.begin(9600);
}

//Return sensor output is HIGH or LOW state
void loop() {
  if (digitalRead(pir_output) == HIGH) {
    Serial.println("HIGH");
  }
  else {
   Serial.println("LOW");
  }
  delay(1000);
}
While testing the module set the time delay and distance range at the minimum otherwise, it may cause mistakenly considering as false triggering if the sensor keeps returning HIGH state. Because, if the time delay is high the sensor keep returns the value for several minutes for triggering happened before. And a high sensitivity causes triggering from your body presence or other objects. So, the sensitivity setting should be optimum so as to avoid unwanted triggering and detect the wanted presence.
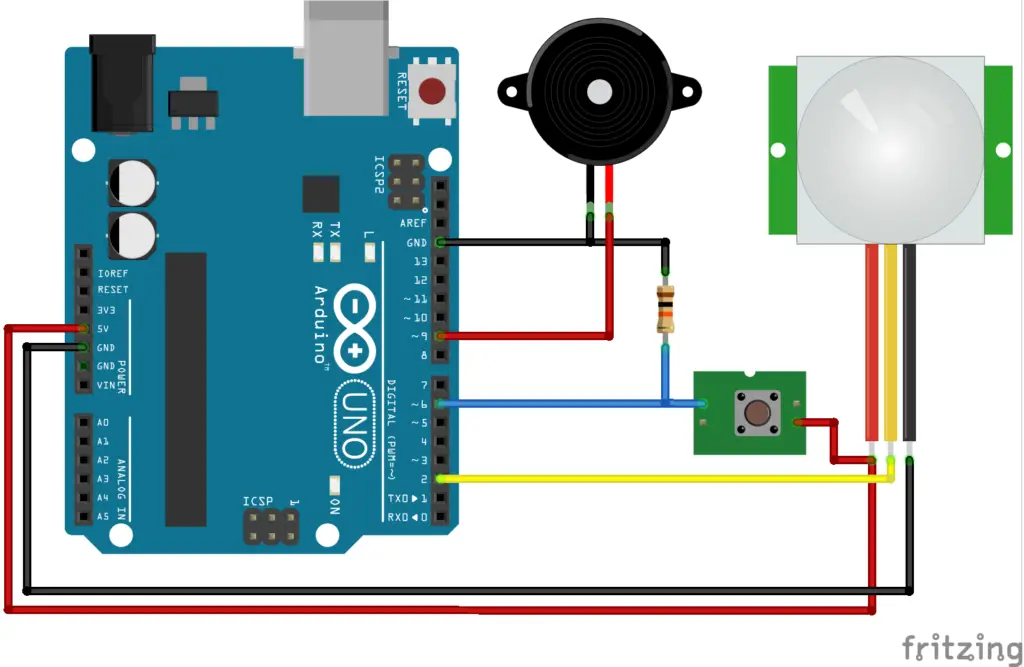
Arduino PIR detector with alarm and reset
This code just turns ON the flasher and alarm, then keeps it ON until reset by pressing the reset switch.
Code
const int pir_output = 2, reset = 5, alarm = 13;
/*PIR sensor output at pin 2
* Reset input at pin 5
* Alarm at pin 13 */
void setup() {
  pinMode(pir_output, INPUT);
  pinMode(reset, INPUT);
  pinMode(alarm, OUTPUT);
}

void loop() {
  if (digitalRead(pir_output) == HIGH) {
    digitalWrite(alarm, HIGH);//ON alarm
    //code for other operations to execute.y
  }
  if (digitalRead(reset) == HIGH) {
    digitalWrite(alarm, LOW);
    //After reset, no triggering for next five seconds.
    delay(5000);
  }
  delay(1000);
}