Ultrasonic Distance Measurement Using Arduino | How to make
An ultrasonic distance measurement is a non-contact distance ranging technique. It is simply based on using the echo. That is calculating the distance by analysing the time required for the propagation of sound waves.
Here we are using a high precision HCSR-04 ultrasonic sensor module for the arduino based distance measurement.
HC-SR04 ultrasonic sensor
An hc sr04 ultrasonic module is a non-contact range measuring device consist of an ultrasonic transceiver unit (transmitter and receiver section) and a control circuit.
The transmitter and receiver section has a similar ultrasonic transducer. The transmitter section transmits ultrasonic sound waves corresponding to the electrical signals given to the transducers.
The hc sr04 module has 4 pins, Vcc, trig, echo and GND. To initiate the HC-SR04, a trigger pulse of 10us should be given to the trigger input of the module (here, the trig pin is connected to Arduino pin2). An active high state input greater than 10us will initiate the module. On receiving the trigger pulse, the HC-SR04 module sends eight cycle burst of 40KHZ ultrasound pulses (8 x 40KHZ); operation frequency of the ultrasonic module is 40KHZ.


The ultrasonic signals reflected by objects are received at the receiver transducer and it is converted back to electric signals. From this signal, the module analyses the time taken for the propagation of waves.
The module generates a pulse width output at the Echo pin in proportion to the distance to the reflecting surface.
HC-SR04 ultrasonic sensor Arduino interface
| Arduino pin | HC- SR04 |
| 5V | Vcc |
| Digital pin (eg:- 2) | Trig ( Trigger Pulse Input ) |
| Digital pin (eg:- 3) | Echo( Echo Pulse Output ) |
| GND | GND |

The Arduino code converts the output durations at the Echo pin to the corresponding unit of the measured distance.
Conversion method of the pulse width to distance values,
Distance in centimetre = Duration in uS / 58
Distance in inch = Duration in us /148
The total travel time of waves is the value of duration (High-level time of echo output) or the pulse width. So the travel time required to reach the object is duration/2.
Distance = Velocity x time
The velocity of sound = 340m/s
Distance = 340 x duration x 10 -6 /2 (duration in micro seconds is converted to seconds by , multiplying 10 -6 ).
Distance in centimetre = duration * 340 * 10-4 / 2
= duration / 58
Distance in inch = duration * 340 * 10-4 / 2 * 2.54
= duration / 148
An hc-sr04 ultrasonic module can measure the distance to an object up to a range of 2cm to 400cm, with a measuring angle of 30 degrees.
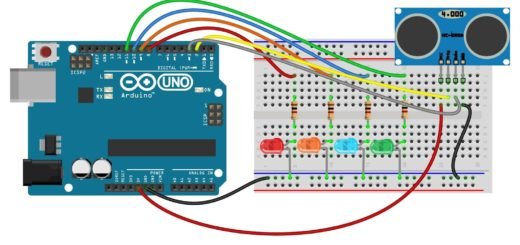
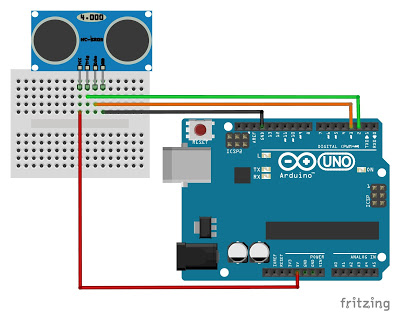 Circuit for ultrasonic range finder for serial monitor display
Ultrasonic range finder serial monitor display
The distance values can be converted to either centimetres, metres, inches, etc.Here in the program, the time period in microseconds is converted to centimetres and Inches by dividing by 58 and 148 respectively. The measurements taken at every 100ms will be displayed on the serial monitor of the Arduino IDE.
Serial monitor ultrasonic distance measurement code
const int trig = 2, echo = 3;
long duration, Distanceincm, Distanceininch;
void setup() {
  Serial.begin(9600);
  pinMode(trig, OUTPUT);
  pinMode(echo, INPUT);
}

void loop() {
  digitalWrite(trig, HIGH);
  delay(15);
  digitalWrite(trig, LOW);
  duration = pulseIn(echo, HIGH);
  Distanceincm = duration / 58;  // time to centimetres
  Distanceininch = duration / 148; // time to inches
  Serial.print("Distance in cm = ");
  Serial.print(Distanceincm);
  Serial.print("   Distance in inches = ");
  Serial.println(Distanceininch);
  delay(500);
}
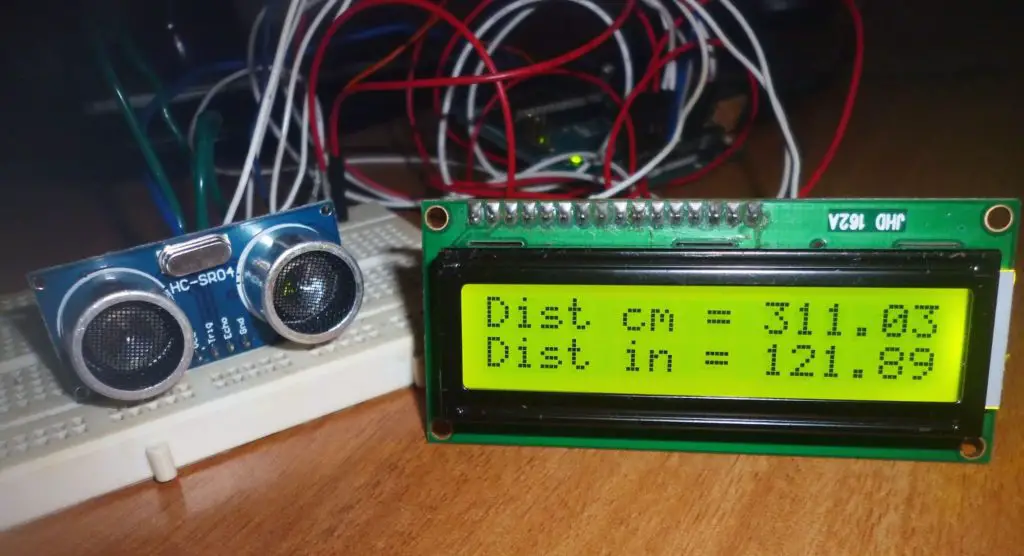
Ultrasonic distance measurement with LCD display
In LCD interfaced distance measurement the remaining of the system is same, except instead of the serial monitor here we are using a 16×2 LCD module to display the readings.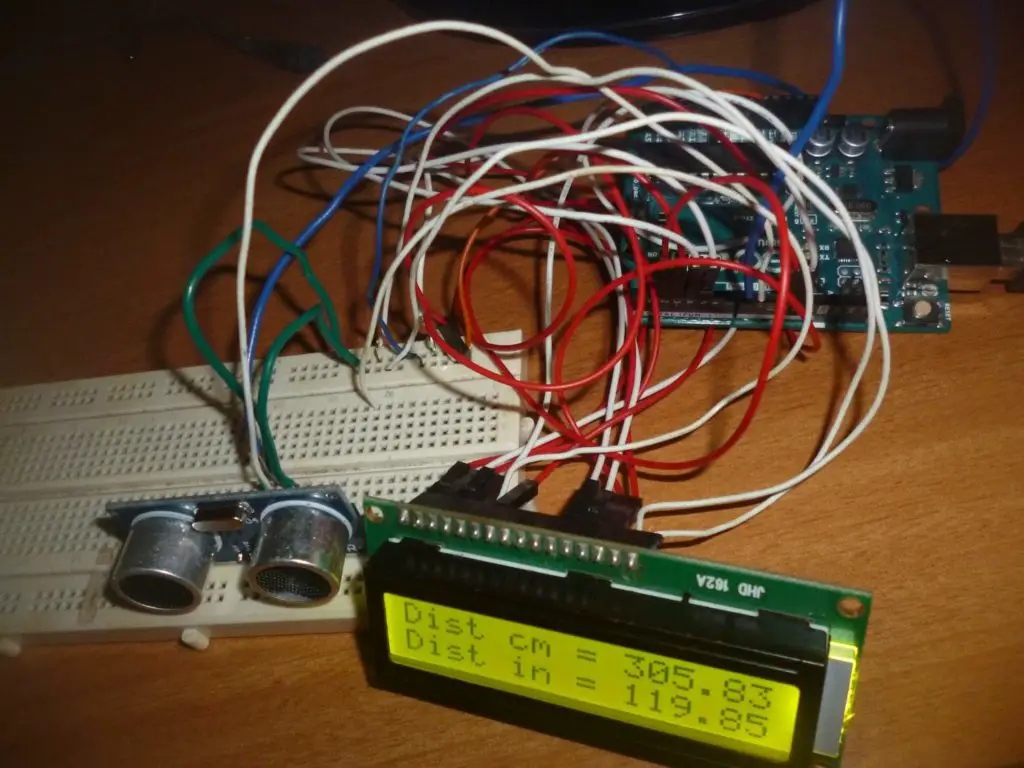
Refer: LCD matrix interface with Arduino
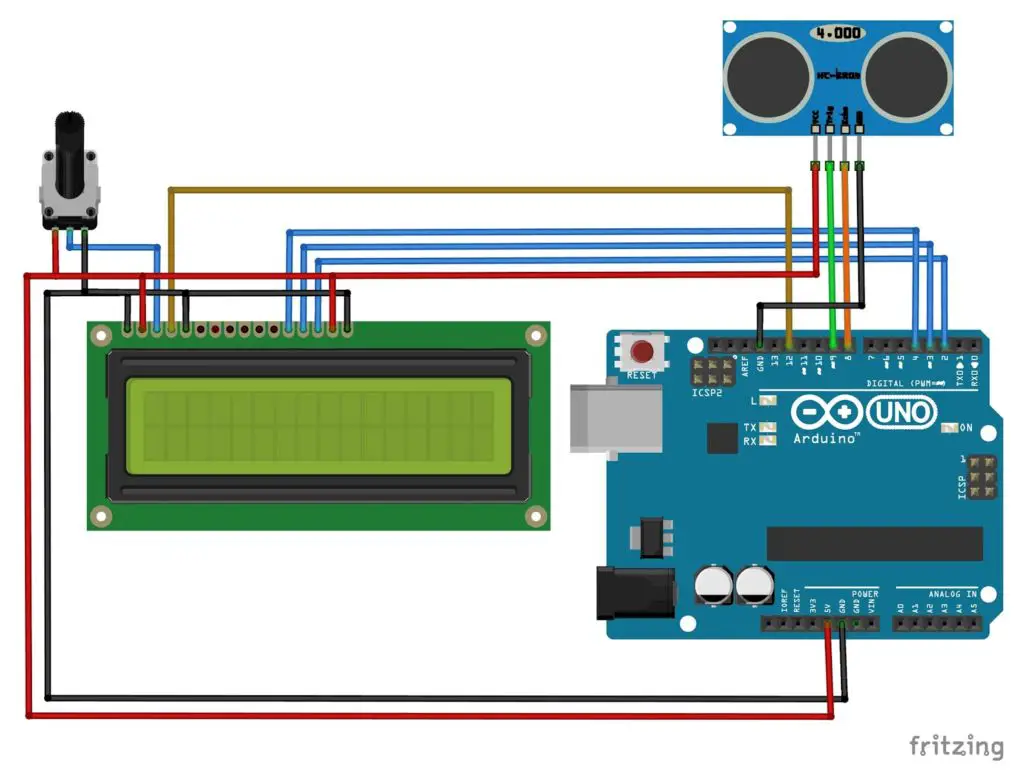
Arduino Code for Ultrasonic Sensor with LCD
#include <LiquidCrystal.h>
const int trig = 9, echo = 8;
float duration, Distanceincm, Distanceininch;
LiquidCrystal lcd(12, 11, 5, 4, 3, 2);
void setup() {
 lcd.begin(16, 2);
  pinMode(trig, OUTPUT);
  pinMode(echo, INPUT);
}

void loop() {
  digitalWrite(trig, HIGH);
  delay(15);
  digitalWrite(trig, LOW);
  duration = pulseIn(echo, HIGH);
  Distanceincm = duration / 58;
  Distanceininch = duration / 148;
  lcd.setCursor(0, 0);
  lcd.print("Dist cm = ");
  lcd.print(Distanceincm);
  lcd.setCursor(0, 1);
  lcd.print("Dist in = ");
  lcd.println(Distanceininch);
  delay(100);
}
3 pin PING))) sensor
A Parallax PING))) is a 3 pin header Ultrasonic Distance ranging Sensor. It has a single shared I/O signal pin “SIG”, used to trigger and read the return echo pulse from the Ping sensor. Whereas an HC- SR04 uses separate trig and echo pins for the same operations.
Parallax PING))) sensor connection to Arduino
| Arduino pin | PING |
| 5V | Vcc |
| Digital pin (eg:- 2) | SIG ( I/O ) |
| GND | GND |
Parallax PING sensor Arduino code
const int sig = 2;
long duration, Distanceincm, Distanceininch;
void setup() {
  Serial.begin(9600);
}

void loop()
{
  pinMode(sig, OUTPUT);
  digitalWrite(sig, HIGH);
  delayMicroseconds(15);
  digitalWrite(sig, LOW);
  pinMode(sig, INPUT);
  duration = pulseIn(sig, HIGH);
  Distanceincm = duration / 58;  // Pulse width to centimetres
  Distanceininch = duration / 148; // Pulse width to inches
  Serial.print("Distance in cm = ");
  Serial.print(Distanceincm);
  Serial.print("   Distance in inches = ");
  Serial.println(Distanceininch);
  delay(500);
}
Connect HC SR04 as a 3 pin ultrasonic sensor
A 4 pin HC SR04 need to be interfaced like a 3 Pin Sensor module for a 3 wire connection, which shares the trigger and echo pins to operate in a single line. An HC SR04 module can operate through a single line as like a PING sensor. So it can run with the same Arduino code used for a PING))) sensor.
For that, connect both echo and trigger header pins to a single digital pin of the Arduino board and upload the same code used for PING sensor. In the program, the specified pin first configures as output and give the high state trig pulse. Then it Configures as an input pin and reads the echo. That is for each measurement the pin switches to output and input alternatively, performs read-write operations through a single wire.
 The world of hobby 3D printing: Can non-techies make it?
 Solving any problems: Apply this simple technique
 How to overcome Laziness: The Japanese Kaizen 1 minute method
 5 simple Tips to fall asleep early at night
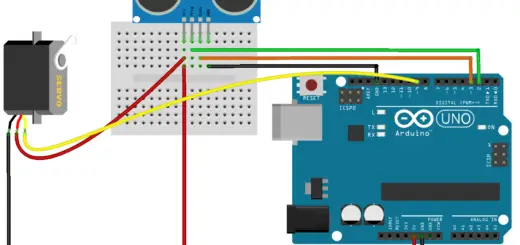
Nice project
Hi, came upon your nice project. I am trying to find a way to measure a position for a ball. the sensor is away about 12 inch from the starting point and possible with increments of 1.077 of an inch. meaning ball is on 1.077 will display as 1 and 2.154 will display 2 ect. Is this possible, and my last question can you use a larger display. Thanks
Yes, it is possible, you can simply do it by a math formula.
And, of course, a larger display can be used.
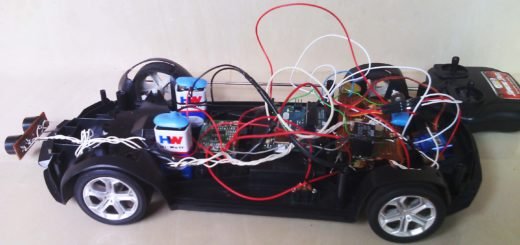
We have a project, based on ultrasonic Sensor based car braking system so I want proper coding for the project and a proper circuit or diagram we have used components like ultrasonic Sensor Arduino Uno lcd display and 4 DC motor of 60 rpm
You can refer this : https://mechatrofice.com/arduino/ultrasonic/automatic-braking-system
haloo im still cofusing with the calculation for the distance, i have a container with height 25 cm . so where need i to change value on coding ? can you help me to figure it out
Could you explain in a little more detail?
what if i use lcd with i2c display?
No problem, it will work fine.